Thursday, November 29, 2012

Dessert In a Pinch & a Parent/Teacher Conference

You gotta love it when you have about 10 half gallons of ice cream in the freezer and "everyone" still thinks there is no dessert........ So instead of getting in a snit about it, I offered to make chocolate pudding parfaits.  Rest assured it sounds way more fancy and complicated than it really is.  It's pretty much pudding in a cup with come cool whip.  What I love about this is that it does taste really good, is super easy to make andddddddddddddd everyone likes it.


All it is, is instant chocolate pudding and chocolate pudding mixed with cool whip.  It doesn't take a rocket scientist.  And it looks all pretty, too...

Earlier today I had a lovely parent/teacher conference. This was a planned affair. Not an emergency meet and greet or anything.  Come to find out C#2 has been a little less than honest about homework andddddd she's a bit snippy to boot. Oye!  Of course, she isn't considered a problem, but, in my book any problem is a problem!  Her teacher told me she had homework for tonight and I made sure to ask her when I got home -- you know just to see if she would fess up. Thankfully she did. She didn't even deny her snippy-ness or lack of homework dishonesty.  I was slightly shocked. I gave her an earful and a very stern warning, then told her to get her homework done.  Wellllllllllllllllllllllllll, this lovely lady left-it-in-her-locker. UGH! I went through all that hard work, she fessed up and then she leaves it at school!?!?!?!?!? Figures.  Hopefully she has time to finish it up before her class.  I guess we will find out tomorrow.

That's it for today... Till next time!

Tuesday, November 20, 2012

Who Wants Some Fried Pumpkin Pie?!? ME!!!

I was put to the challenge to make fried pumpkin pie. Challenge accepted. I had recently watched a Paula Deen episode about chicken empanada thingies that were made with pre-made pie dough and fried. I thought, well there must be a way to do pumpkin pie.  I went straight to the internet since time was of the essence.

I found a blog and basically followed the recipe. My changes are in bold.  The recipe is after the pictures... http://www.heatherchristo.com/cooks/2012/10/26/fried-pumpkin-hand-pies/


I used my drink mixer thingy to make the circles -- it was a little less than 4 inches, but, worked.


The filling that I pre-made. 


The filling and marshmallows on the pie crust circles and then sealed in with a fork. 


Ready for frying!!


They cooked up super fast!!


Then I dipped them in a bowl with sugar/cinnamon.


Recipe: Fried Pumpkin Hand Pies

Ingredients

  • -1 recipe Best Crust Recipe, chilled (I used pre-made Pillsbury Dough)
  • Pumpkin Vanilla Bean Filling: 
  • -1 15oz can pumpkin puree
  • -1 cup brown sugar
  • -1 Tbs Vanilla bean paste (I just added vanilla extract)
  • -1 tsp cinnamon
  • -½ nutmeg
  • -½ ginger
  • -½ tsp salt
  • -1 cup cream
  • -2 eggs
  • (Mini marshmallows!)
  • -1 quart Vegetable Oil for frying

Instructions

  1. 1. Preheat the oven to 350 degrees.

  2. 2. In a 9×9 baking dish, add all of the filling ingredients.

  3. 3. Combine until smooth.

  4. 4. Bake the pumpkin filling for 45 minutes. Take the filling out and leave until cooled.

  5. 5. Using a 4 inch cookie cutter, cut circles out of the chilled pie dough.

  6. 6. Spoon the chilled filling into the center of the circles. (Top with 3 mini marshmallows)

  7. 7. Fold the pie dough over and pinch and fork tine the edges. Chill in the refrigerator while you heat the oil.

  8. 8. Heat the oil in a heavy pot over medium heat.

  9. 9. Gently fry the pumpkin hand pies until the dough is golden brown.

  10. 10. Drain for a moment on paper towels and sprinkle with cinnamon sugar.

  11. 11. Eat while hot!
Preparation time: 20 minute(s)
Cooking time: 1 hour(s)
Number of servings (yield): 12
I ate three of them, C#2 ate FIVE!! She really liked them. I had to stop myself. My stomach IS full and I need to listen.  There are too many food filled days coming up!! 
I highly recommend these! Calories be damned!!!
That said, I hope everyone has a "Happy Thanksgiving!" 
Till next time...

Monday, November 19, 2012

An Excellent Salmon Recipe!!!!

I did my usual Walmart/Sam's Club run today and in the process planned on picking up something for dinner.

I ended up at Walmart twice. C#1 sprung a class project on me and decided he had to have "x" amount of said item. Of course, he didn't think of the cost --- which would have been a whopping $50!!! Helllllllzzzz NO!  Thankfully I had called his teacher and we were able to whittle that price in half, but, still. GRRRRrrrrrr! ANDDDDD the fact that I have to "babysit" said project while he's at school, in order for him to complete it on time. Oh the joys.....

Anyway, back to my food purchase. I thought I would pick up a nice slab of salmon. It seemed like a good price at Sam's, so I bought it.  The preferred method of cooking this is the grill, but, I am/was far too lazy to do that. AND I was far to lazy to look through my cookbooks, so to the internet I went.

I found this:

http://allrecipes.com/recipe/baked-salmon-ii/

Sadly, I did not take any pictures, but, it was delish and super easy!!!! And I was probably encouraging all the germies to hop on board, because I didn't marinate it in the fridge. My fridge is PACKED!

No one is complaining of a "belly" so we might be in the clear.

OH! And I saved over $13.00 at Walmart doing price match! Whoohoo!

Till next time...


Sorry Mom! But, I promise I'll help!!!


Sunday, November 18, 2012

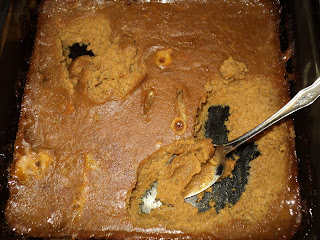
Pumpkin Fudge FAIL = Pumpkin Doughnut Muffins WIN!

I was looking through my pumpkin cookbook called Pumpkin: A Super Food for All 12 Months of the Year by Dee Dee Stovel and found an interesting fudge recipe.


So I made the fudge -- even doubled the recipe! Licked the pan, spoons, etc... And it tasted great. However, it did not harden. I put it on ice packs, in the fridge and finally in the freezer. FAIL! We resorted to pouring it on ice cream. That tasted good, but, I still had a humongous pan of saucy pumpkin stuff.  Soooooooooooooooooooo, I found another recipe in the same cookbook for muffins. I thought the exchanges might work. But, I was a little hesitant since you can't "normally" mess around with all that baking stuff.  But lo and behold it worked!! I will list both recipes, since they might work for you. I think the problem I had with the fudge was that I didn't cook it long enough. I don't have a candy thermometer and "thought" it got hot enough, but, apparently it didn't.

"Pumpkin Fudge" pg 212

2 cups sugar
1/2 cup evaporated milk
3 tablespoons, canned pumpkin
1/2 teaspoon cinnamon
1/4 teaspoon cornstarch
1/2 teaspoon vanilla

1. Grease 9 inch square baking pan with butter

2. Combine the sugar, milk, pumpkin, cinnamon, and cornstarch in a large saucepan. Cook over low heat, stirring constantly, until mixture boils. Still stirring, continue to cook until the mixture reaches 236 degrees on a candy thermometer.

3. Remove from heat, add the vanilla, and beat with an electric mixer until the mixture is smooth.  Scrape into the prepared pan and let cool.

4. When it is completely cooled, cut into squares and enjoy or warp carefully and store in the refrigerator for later.

"Pumpkin Doughnut Muffins" pg 144

1 cup sugar 
1/2 cup unsalted butter (I used salted)
2 eggs
1 3/4 cup canned pumpkin
1/4 cup buttermilk
3 cups unbleached flour
1 tbl baking powder
1 tsp baking soda
1 tsp salt
1/4 tsp nutmeg (didn't use)

Topping
1/2 cup sugar
2 tsp cinnamon
4 tbl butter, melted

1. Heat oven to 350 degrees.

2. Beat the sugar and butter together in a large bowl, until fluffy. add the eggs, one at a time, beating after each.  Beat in the pumpkin and buttermilk.

3. Sift the flour, baking powder, baking soda, salt, and nutmeg into the pumpkin mixture, beating until smooth.  The batter will be stiff

4. Spray two 12-cup muffin pans with butter flavored spray. Divide the batter among the 24 cups and baked for 25 to 30 minutes or until muffins are golden brown and tester comes out clean. Cool the muffins for a few minutes on the wire rack.

5. For the topping, mix the sugar and cinnamon. When the muffins are cool enough to handle, generously brush the tops with butter and roll in the cinnamon and sugar. Cool and serve.

(I used two bowls -- one with melted butter, the other with cinnamon/sugar. I used muffin cups for the regular muffins and then dipped them in the butter and then the cinnamon - easy peasy!)

-------------------------
When I made the muffins I did not add the sugar (since there was already a little less than four cups in the fudge) and the buttermilk. I also didn't add the nutmeg because we like cinnamon better and that was in the fudge, too.

I globbed the "failed fudge" into everything else, sort of following the order in the muffin recipe. It made more than the 24 muffins. I got a tray of mini muffins and a teense bit more leftover.


My recipe being all nifty and hanging on my skirt hanger. The failed fudge on the left and the muffin cups to the right.


The finished muffins all dipped in butter and sugar.


IF I were to make this recipe again, I would definitely add 1-2 cups more sugar, add vanilla and cinnamon.  I would use the buttermilk (or maybe use sour cream as a substitute for that), and follow everything else basically the same.  I find I like my pumpkin stuff sweeter, therefore MORE sugar!

I would probably purchase a candy thermometer before making the fudge, again. It would be amazing, I just know it. Maybe next year.

That's it for today.... Till next time!


A Genius Cookbook Holder! And Scoopable Sweet Potatoes!

My Mom posted a nifty idea for a cookbook holder. And you probably have one in your closet. A pants or skirt hanger!


This example is a little bit cockeyed because the recipe was the very last one in the book I was using --- sooooo one side was definitely heavier than the other. And I will be blogging about that recipe in the near future!

I also decided to cook up some squash and the sweet potatoes I had to make some dessert.  I discovered that if you cook the potatoes and squash to nearly charred (black on the skins,) they are easily removed from their skin.  I cut the potatoes in half and could pretty much peel the skin off and scooch out the potato-y goodness.  I am sure I'm just slow to figuring this out. But, I haven't had too much experience with sweet potatoes.  I usually buy that stuff in a can, if I even bother at all.

That's it for now. Till next time!


Saturday, November 17, 2012

Pumpkin Pancakes!

I was doing my normal routine and perusing FB to see what all the peeps were up to. I noticed that my BFF was at IHop enjoying some pumpkin pancakes. That sounded downright delicious! I was not, however, making a trip to an IHop.

I started looking through cookbooks and found one for pumpkin pancakes, but, it didn't sound alllll that special. I pulled out my copy of The Pioneer Woman Cooks by Ree Drummond and happened upon "Edna Mae's Sour Cream Pancakes" on page 76-77.  That sounded awesome and I figured I could just throw in some pumpkin and cinnamon.... But would it work!??!?!?


OF COURSE!!!

It claims to make 12 - 4 inch pancakes, but, I only managed about 8 and I "followed" the recipe. So I whipped up a second batch, just so everyone could have a healthy helping.

Here's the recipe with my additions or changes in bold --->

1 cup sour cream
7 Tbsp all-purpose flour 
1 Tbsp sugar (I added 1 Tbsp more.)
1 tsp baking soda 
1/2 tsp salt
2 large eggs
1/2 tsp vanilla extract (or more!!)
butter
maple syrup
Cinnamon!
1/2 -3/4 cup pumpkin (from a can.)


Place an iron skillet or griddle over medium-low heat.  (a regular skillet works just fine.)

Place the sour cream in a medium bowl. Dump in the flour, sugar, baking soda, and salt (AND cinnamon and pumpkin!). Stir together very, very gently. 

Whisk the eggs in a separate bowl. Add vanilla and stir to combine. (I added the vanilla to the sour cream mix -- I didn't see why it needed to go into the eggs.)

Pour the egg mixture into the sour cream/flour mixture. Stir together gently.

Melt about a tablespoon of butter in the skillet (I used more butter/shortening than this and it worked fantastically!). Pour the batter into the skillet 1/4 cup at a time. Cook for 1 to 1-1/2 minutes, then flip the pancakes over (they cooked for a little bit longer than stated here -- they were too runny otherwise.) Cook for another 45 seconds and remove to a plate. Repeat with the remaining batter. 

These were on for a teense bit too long, butttt, they tasted perfectly fine!

Top with soft butter and warmed maple syrup.


So there you have it. Your very own homemade pumpkin pancakes!  Think of all the money you will save! And you can stay at home -- all snuggy warm.

Till next time!


Monday, November 12, 2012

Five Loaves of Bread Thawed. What to do?! Cinnamon Rolls!!

When I go to Walmart to price match, I sometimes pick up a "Rhodes White Bread Value Pack" (of five.) This serves as a good "ice pack," especially when I forget to throw one in the cooler bag.  Anywayyyyyy, I put one of them at the top of the chest freezer and for some reason or another, it didn't freeze!!!! Well, it didn't freeze the whole way and it was starting to rise. UGH! I hate to waste anything, so I brought the bag upstairs and put it in the refrigerator.  There is proceeded to rise some more. Expanding the bag to it's full capacity.

Watch out it's going to explode!!!

After raking my brain to figure out what to make, besides three pizzas or three calzone I thought, "What about cinnamon rolls?! Where is there a recipe for that? To the Internet!!!"

And with a quick entry into my search bar, I found a whole list of recipes using this actual bread. YAHOO!! I settled on this one: 

http://southernfood.about.com/od/cinnamonrolls/r/bl30620c.htm 

I only picked it because it had an easy drizzle for the top, buttttttttttttt, once they were done everyone agreed that cream cheese frosting would be better. And I got that recipe from Mr. Food:

http://www.mrfood.com/Cakes/Buttery-Cream-Cheese-Frosting-508

The recipe I used included vanilla, but, it was basically the same.

I used more than one loaf, so the recipe made more than the allotted 20.  I also did not let it rise. It didn't appear to need to, since it had "risen" in the fridge.


I rolled it out as far, as I could. Bread dough is ultra springy, which makes it kind of hard to roll out.


Here they are after being brushed with butter (I also dumped some vanilla on the butter) and then sprinkled with sugar/cinnamon. 


Here they are with the drizzle, which wasn't enough sweet... Good, but, not good enough!


Andddddddddd here is the final product with the cream cheese frosting. OHMYGOODNESSSSSSSSS!!! They were/are delicious!!

I also had three-ish loaves of bread to deal with, so I made two pizzas for lunch.


Sooooooooooooooooo, three pieces of pizza and two cinnamon rolls later, I am done eating for the day and it's only 2:30 pm.  I am not sure how that's going to work. I guess I will be eating lettuce and breaking out some "Cup of Soup." 

Till next time....


Sunday, November 11, 2012

Chicken Enchiladas & Wreck It Ralph

I was trying to think of something Mexi to make for dinner. I had hamburger and thennnnnnn I remembered I had a bunch of flour tortillas. I was debating between regular tacos or something fried or baked. I happened upon a recipe for enchiladas, buttttttttt, it was for chicken.  But, you know I will NOT allow a main ingredient get in my way!

Cook 1 lb. ground beef and 1/2 cup onion with taco seasoning
Add 1 can refried beans, mix well.
Add 1-2 cups sour cream
Add 1 1/2 cup shredded cheddar cheese
Heat through.

Add 1 cup of beef/bean mixture to each 8 inch flour tortilla. Fold up and place in 10x13 inch pan.
Top all of the tortillas with 1 cup salsa and 1/2 cup cheese.  Bake for 30-40 minutes or until heated through.


These were really easy to make and everyone liked them -- well mostly. C#2 is usually the "picky" one, so she just ate the meat part, by itself.

This weekend we also took C#1 and C#2 to see the movie "Wreck-It Ralph."


It was pretty good for a kid flick. The children and hubby loved it. It had lots of nostalgic video game Easter eggs.  It was cute and kidsy. I have found of late, my tolerance for kid's movies is pretty small.  I must be turning into an old fart or something.  

Well, that's it for today. Till next time...

PS... "The Descent: Part 2" was just okay. Definitely not as good as the first.  More of a "b-movie." Some of it was laughable.  But, I enjoyed watching it --- and will probably not watch it ever, again...


Friday, November 9, 2012

Spinach & Feta Dip!!! And The Descent: Part 2!

I was looking through a magazine and came upon a two page spread with all sorts of yummy dips. The top one caught my eye "Spinach & Feta Dip" (page 8, People Extra Magazine: Holiday 2012).


8 oz cream cheese, softened
1/2 cup sour cream
2 oz. feta cheese, crumbled
10 oz. fresh spinach, sauteed, drained and chopped (I used frozen, thawed)
1/2 tsp salt
1/2 tsp black pepper

Blend all the ingredients in food processor: cover and chill for at least an hour. Makes 2 cups.

Thawing the spinach and softening the cream cheese


I put the thawed spinach in a skillet and cooked for about a minute. Added the cream cheese to the spinach to melt. Mooshed it around in the skillet, until smooth-ish (I don't own a food processor and that just seems like too much work.) Then added the feta, sour cream, S&P. Put it in a bowl and plopped into the fridge. I halved the recipe, for the initial trial run.

It tastes really great with tortilla chips and also spread on Ritz crackers. And it's super easy to make! And you could even argue that it's "good" for you. Greens and calcium -- lots of calcium.

Then I was looking on Netflix. I have mentioned in the past that it can be very overwhelming. Butttttt, I happened upon "The Descent: Part 2."  Now I really liked the first one. And am so excited to watch the second!!!


I can't wait to tell my hubby. He will groan and roll his eyes. He didn't particularly like the first one. I tend to like the gory, gross, horror flicks and him not so much. Maybe I will just have to find a time to watch it in my own.  It isn't supposed to be as "good" as the first one. Rotten Tomatoes only gave it 55%, but, I'm game!!! I will have to let you know how it was at a later date.

Till next time...


Thursday, November 8, 2012

Caramel-Chocolate Mini Bars?! Yes, Please!!

I had a couple friends that were having Pampered Chef parties this past month and felt it was a divine message that I did indeed need new PC stuff. I love PC stuff, but, it's so expensive. But, like I said ---  I love it and it works great. Anywayyyyyyyy, the October dealio was if you spent this big wad of money you get a free cookbook. Yes, you read right a FREE COOKBOOK!! And I always need a new cookbook -- ALWAYS!! Well as I was perusing this book, I found that I want to make everything in it!!  And I mean that. So after torturing the family with the pictures, they ask me, "Well are ya gonna make it?!?" Of course, it was 9:00 pm, so no. But, I made a plan to do it today. And here's what I made --->


"Caramel-Chocolate Mini Bars" from Pampered Chef: Simply Sweet, pg 23.

1 cup quick or old fashioned oats (I used quick.)
1 cup flour
1 cup packed brown sugar
1 teaspoon baking soda
1/4 teaspoon salt
1/2 cup (1 stick) butter, melted
1 (14 oz) package caramel candies, unwrapped (I used a bag of caramel mini bites by Kraft.)
2 tablespoons heavy whipping cream (I used half and half.)
1 cup milk chocolate morsels (I melted three Hershey bars.)
1. Preheat oven to 350. Combine oats, flour, brown sugar, baking soda and salt in bowl and mix well. Add butter and mix until crumbly. Press crumb mixture onto bottom of ungreased Medium Sheet Pan (do not use stoneware). (If you do not have a Medium Sheet Pan, you can use a 9 x 13″ pan.) Bake 20 – 22 minutes or until light golden brown. Remove pan from oven to cooling rack.
2. Place caramels and cream in microwave safe bowl and microwave, uncovered, on high 1 – 3 minutes or until melted and smooth, stirring every 30 seconds. Pour over hot crust, carefully spreading to edges. Let stand 10 minutes or until caramel is set then cut lengthwise into 8 rows.
3. Place chocolate chips in microwave safe bowl and microwave on high 1 1/2 -3 minutes or until smooth, stirring every 30 seconds. Spoon melted chocolate into resealable plastic bag. Twist top of bag and cut corner off bag to make a very small opening. Pipe a continual loop of chocolate down each row. Let stand until chocolate is set then cut crosswise into 6 rows to make 48 mini bars.
They are definitely not as pretty as pictured in the book. I haven't mastered the plastic bag/piping technique. But, they taste amazing!!!!
I was also chatting with my BFF and she mentioned that she had some divine pumpkin bagels. And lo and behold on my last venture to Sam's Club they had them! WHOOHOO!! And they are quite delicious with cream cheese!!

She also said that brown sugar pop tarts were the best. I haven't tried them yet, but, I found these at Sam's, too!


36 lovely Brown Sugar Cinnamon Pop-Tarts!!

The hubby likes these and I'm sure C#1 and C#2 do, too.

The hubby and C#2 took me out to eat for my birthday. I was hankering for a "bloomin' onion." So off to the Outback Steakhouse we went!  My Mom gave me a coupon and my Dad gave me some bucks to pay for my birthday meal. Win, win, WIN!! It was all very delicious. And I must admit we ate every last bit of that onion!


So there you have it. The last few days of my life.

Till next time...


Saturday, November 3, 2012

Oh Dear! I'm Getting Old!


I'm not gonna tell you how many candles are on there. Not that I really care, mind you. YOU can count them if you really want to know.  But, the candles pretty much over ran the cake which equals OLD! Of course, it isn't even my birthday, yet. But, I will never say "no" to cake!

Today we were running around all of creation for C#1's "big wig" concert. He was selected to perform with a larger group outside the normal local area.  He was in a show with 400 students from 117 different middle schools/high schools. It was quite an honor. And it was very impressive.  I was joking with his band teacher that we have set the bar pretty high for our first school band concert.  I guess the local yocals are really gonna have to step it up!


I have also discovered that my newly reinstated toaster oven (since the toaster bit it) can actually broil!! I know, I know. Not anything special, butttttttttttttt, when you are a dunce like me and couldn't use the broiler in the oven if I wanted to -- read burn to a charred, flaming crisp (I'm pretty sure I blogged about that)-- THAT is an accomplishment.

This lovely item will fit a 12 inch pan -- handle out, but, that is entirely okay, since I just need a slight browning on the top.


This was a "Triple D Macaroni and Cheese" with panko bread crumbs, nicely broiled on top. It was delicious! I remember the last time I tried this, it wasn't very successful. Imagine the same set up, except the mac was black! No lie.

I haven't done any extraordinary cooking of late, besides what is pictured above. But, I will try and remedy that soon.

Till next time...